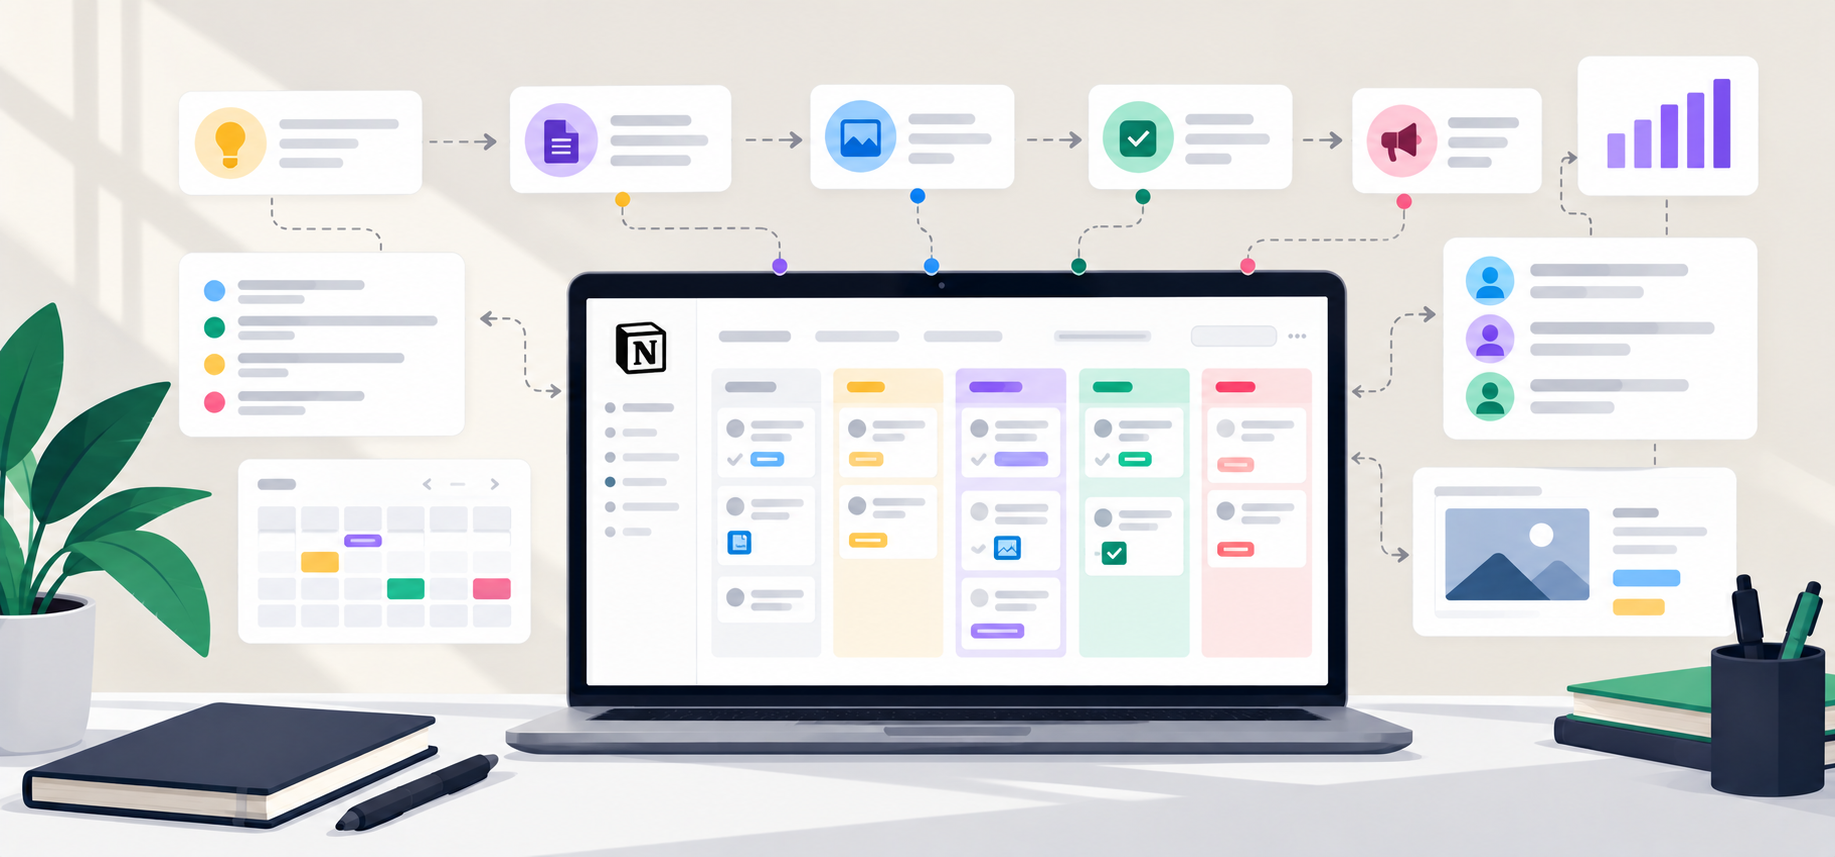
Most content creators struggle to keep track of their content as they grow.
As you publish more content, your notes, drafts, and research end up scattered across multiple tools, making it hard to stay on top of things.
Over time, drafts pile up, and deadlines become too hard to manage.
A Notion content ops board fixes that problem by turning chaos into a structured workflow. It gives you a centralized workspace where you can manage your content pipeline from one place.
In this guide, I’ll explain what a content ops board is and how to build one in Notion. My goal is to help you create a system that’s easy to manage for a 1-person content team.
What Is a Content Ops Board?
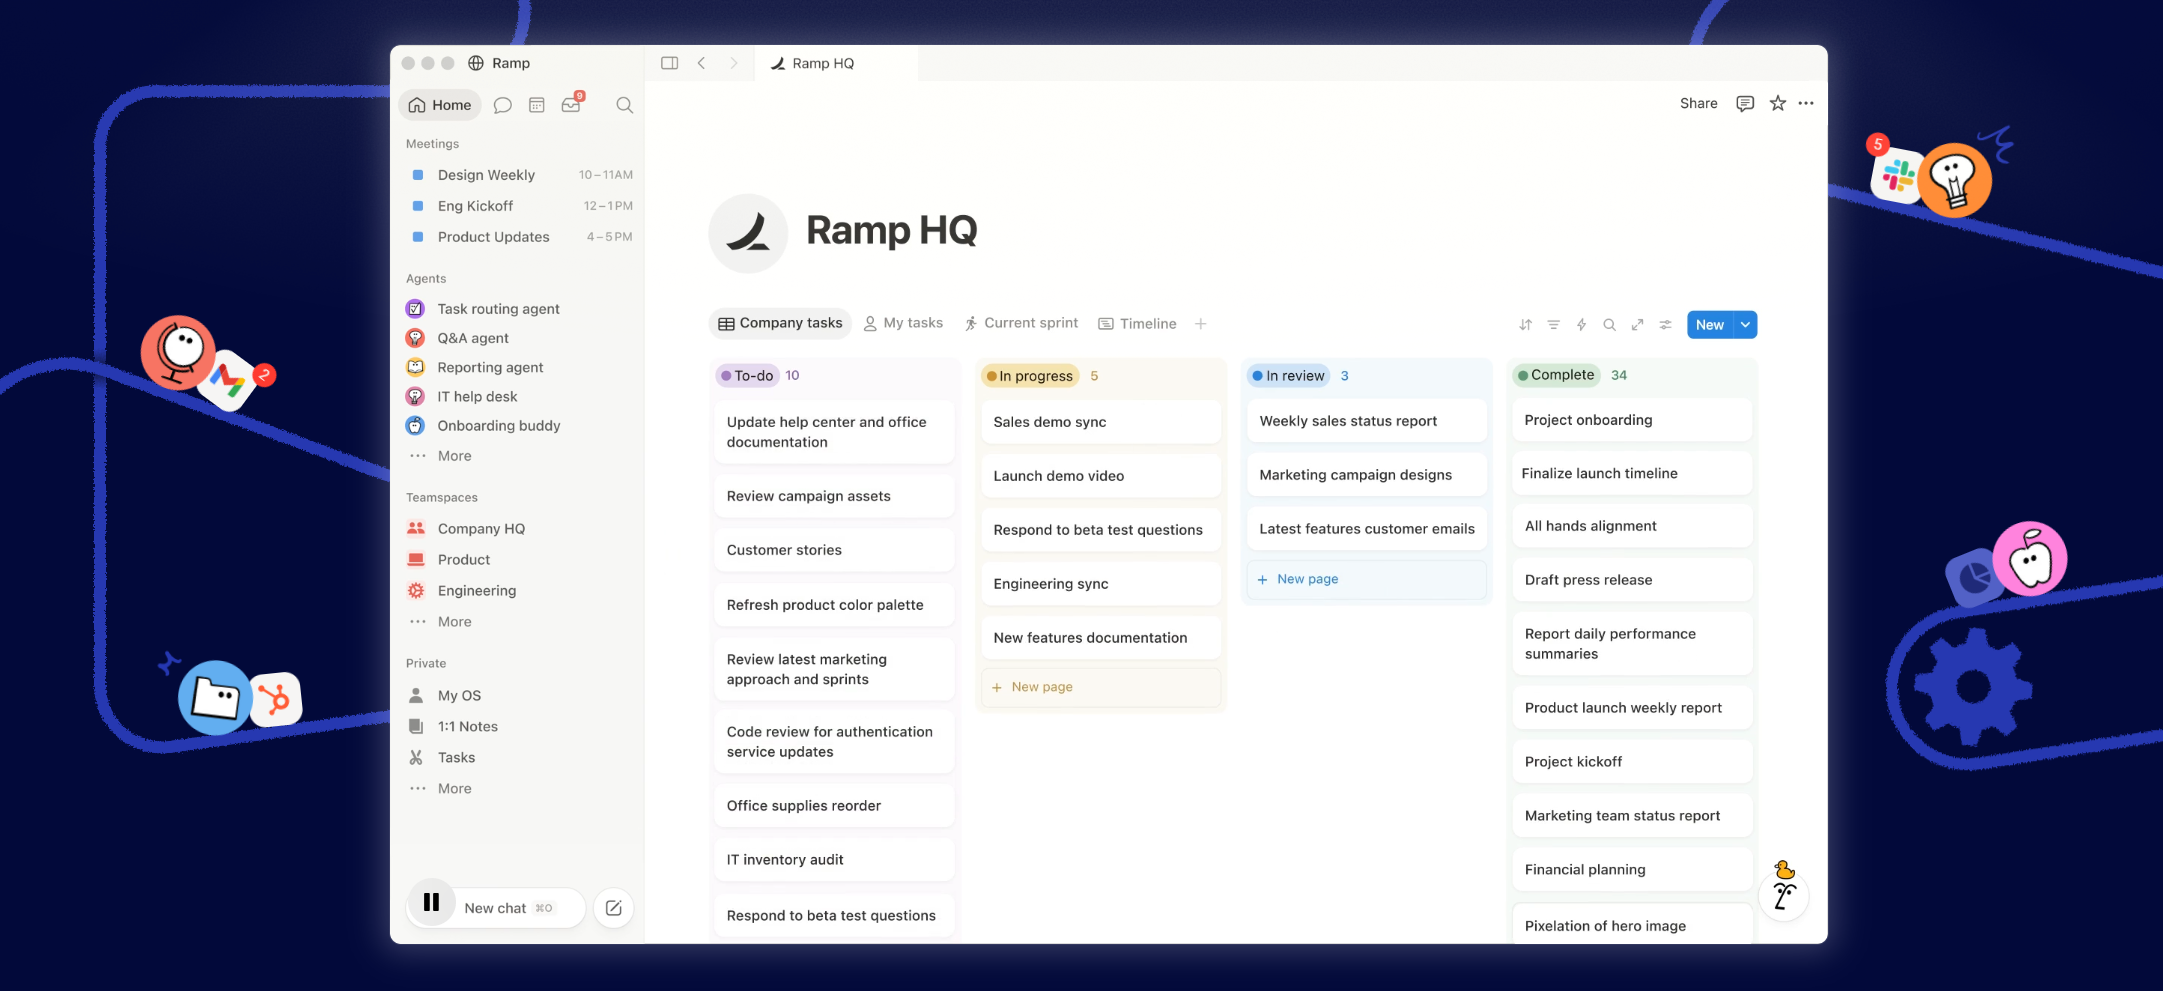
A content ops board is a digital workspace for planning, managing, and tracking content production.
It acts as an operational hub, helping you organize each stage of your content lifecycle, from idea to publishing.
Think of it as a project management tool, but built specifically for content teams.
You can track what’s in the pipeline, what needs editing, and what’s ready for publishing.
Most content ops boards follow a familiar pattern. While they can vary in design, almost all of them have four core elements.
Pipeline Stages
Pipeline stages are the basic foundation of the board. They are columns that display each stage of the production process, such as idea creation, drafts, and publishing.
Content Cards
Content cards represent individual pieces of your content pipeline, like blogs and sales copies. Each card contains details and context to make tracking progress easier.
Scheduling
Scheduling helps you plan and monitor your content production. With features like deadlines and priority tags, you can easily keep everything on track.
Multiple Views
Multiple views let you see your operations from different perspectives. You can switch between the board, timeline, and calendar view to gain more visibility into your content operations.
There are other components as well, but they largely depend on the tool you use. For a 1-person team, these four elements usually cover the day-to-day content operations.
Why Do You Need a Content Ops Board
Content creation is more than just writing.
You need to organize ideas, plan your calendar, track deadlines, and review drafts before publishing.
Without a centralized system, things can get messy pretty fast.
You lose track of articles, forget to edit the draft, and can’t remember if you worked on the feeder article.
Before you know it, you’re losing motivation because deadlines keep getting missed.
A lot of emerging content creators rely on spreadsheets in the beginning to track their content production.
But as you scale, those workflows become harder to maintain, and you end up spending a significant portion of your day finding tasks instead of doing them.
A content ops board keeps everything in one place. This saves a lot of your time and helps reduce decision fatigue.
You can test that theory yourself. Create a content ops board in Notion and monitor your performance for a couple of weeks.
Trust me, you’ll notice the visible difference in your work style and productivity.
Below, I’ve shared a step-by-step guide on how to set up a content ops board in Notion.
But before we get to that, let’s talk about the limitations of a content ops board so you know what to do and what to avoid.
Why Most Solo Content Ops Boards Fail
One of the major reasons most solo content ops boards fail is complexity.
When you add too many stages to your board and overplan everything, your ops board becomes harder to manage than the content itself.
Many creators also tend to focus too much on the tools rather than the process. As a result, they inadvertently optimize their board for content organization instead of content production.
Remember! While organization is the core part of the content ops board, it’s not its primary purpose.
The main goal of an ops board is to make your content easier to manage.
That means it should be simple enough to organize, track, and prioritize content without adding more work to your plate.
How To Create A Simple Content Ops Board In Notion
For a 1-person team, I recommend a basic Kanban board.
It’s easy to maintain and provides enough visibility into your operations.
More importantly, it allows you to spend more time creating content and less on administration.
You can use many productivity tools to create a Kanban board, but Notion is one of the best platforms to get started.
It’s free and provides everything to manage a content workflow.
Here’s a step-by-step guide on how to create a content ops board in Notion.
- Create A Free Account In Notion
Go to the official website and use the sign-up button in the top right corner to create your free account. (I used my Google account to speed up the sign-up process. It’s much faster.)
Once you are inside your private workspace, you can create pages, start a journal, add your calendar, and more.
- Add A New Page
Click the new page in the left sidebar and name it “Content Ops Board.” This is your blank workspace or document. You can use it for a database, content writing, or anything.
- Build A Board
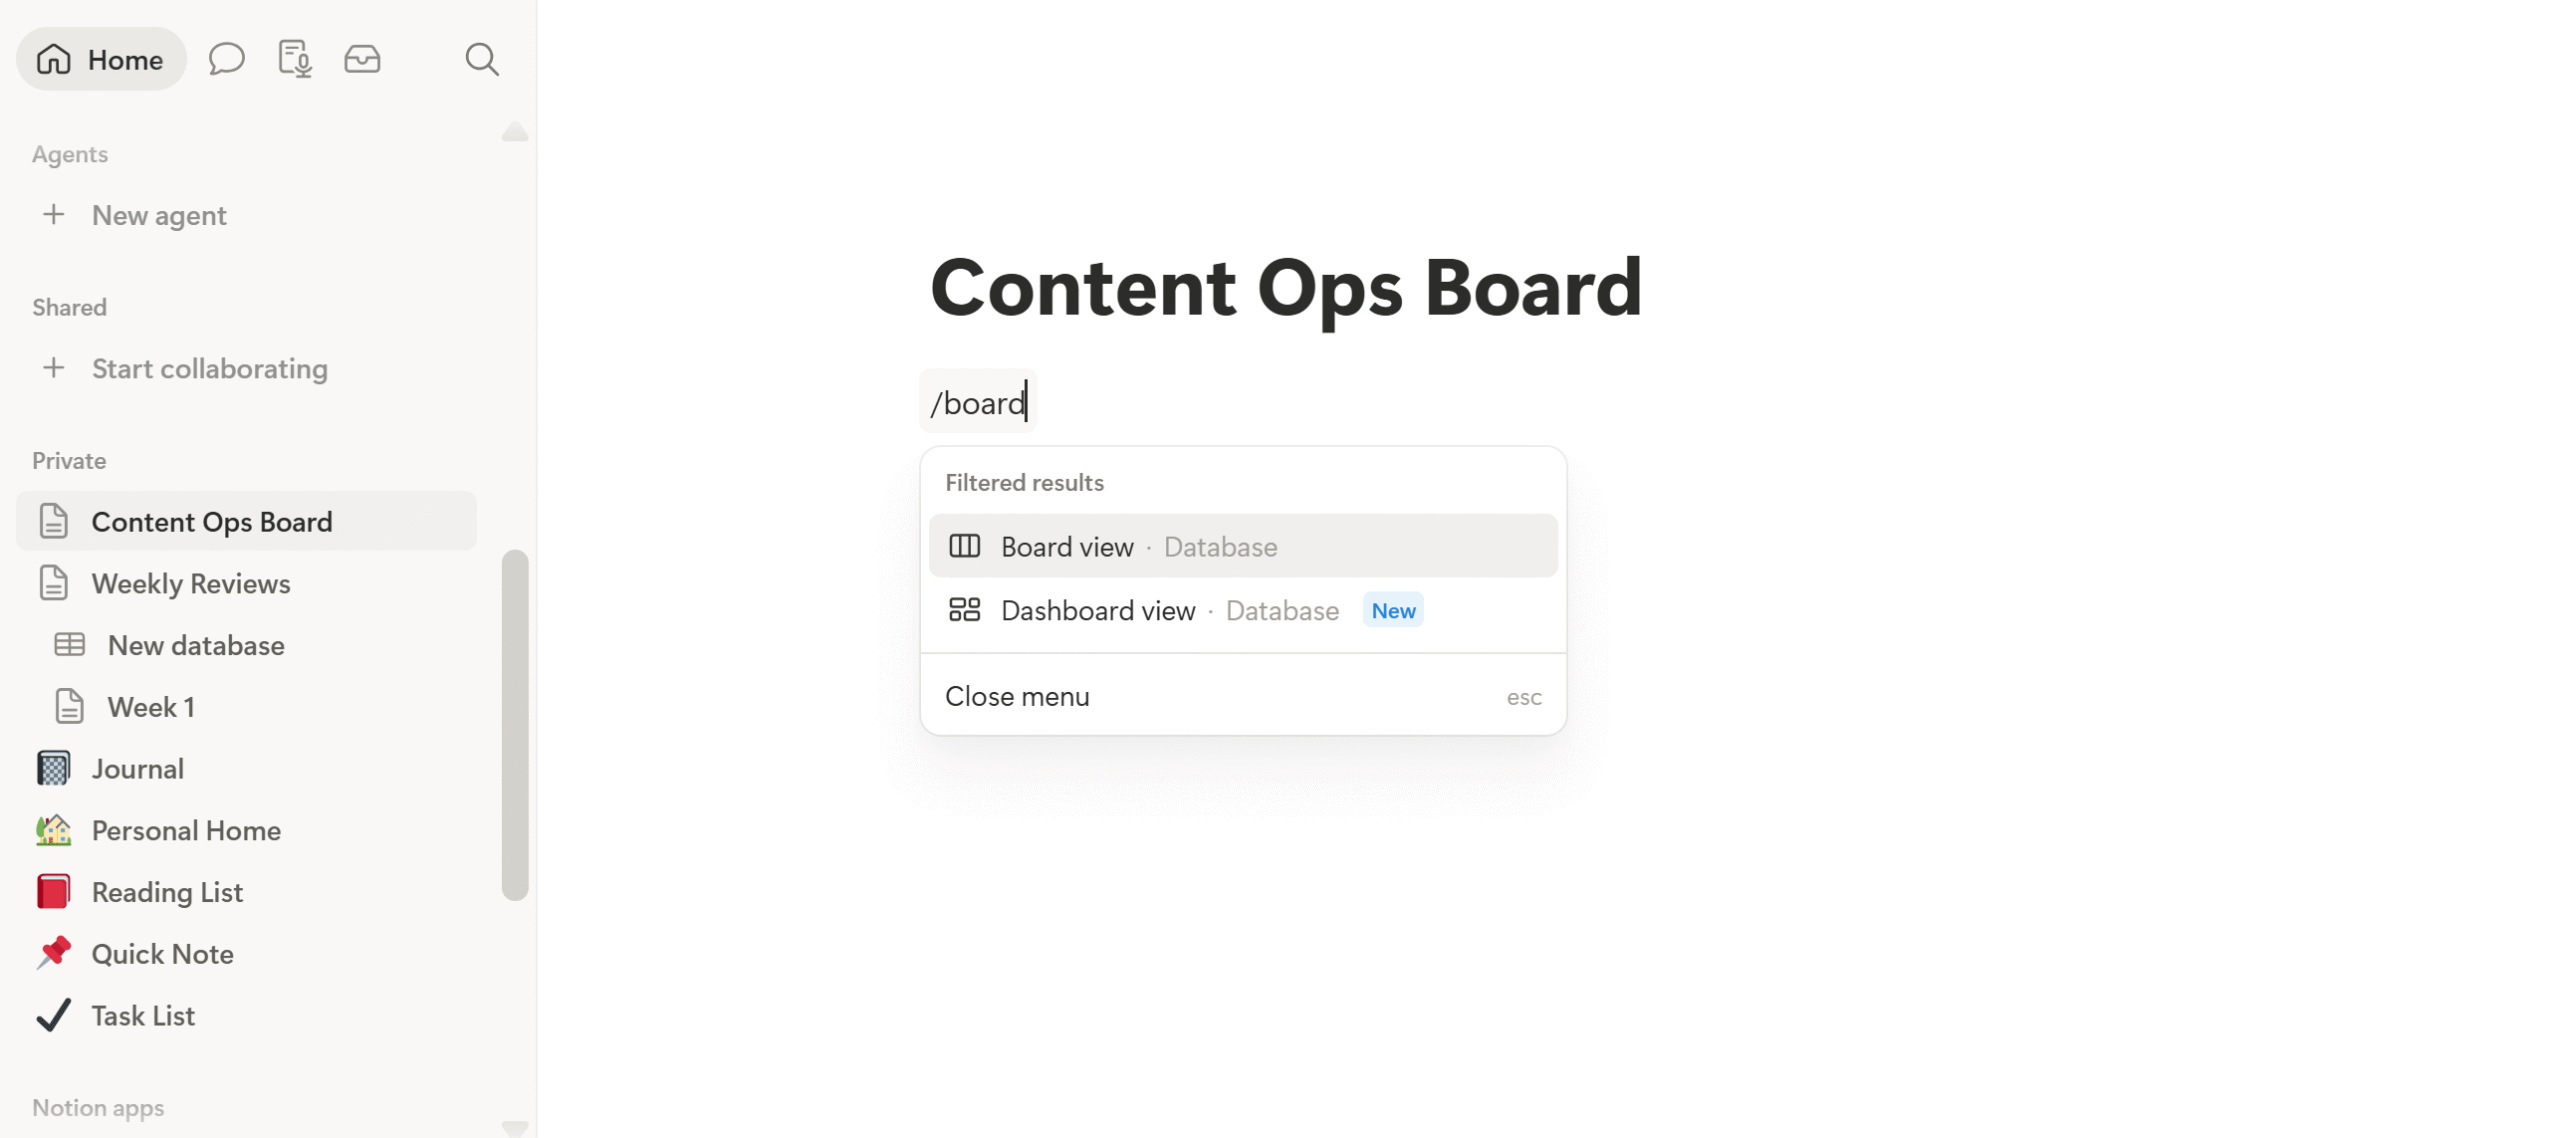
Inside the page, type /board. You are basically commanding Notion to create a Kanban board.
When you type the command, a drop-down menu will appear, displaying multiple options. Select the board view to create the Kanban board.
- Set Up Your Workflow
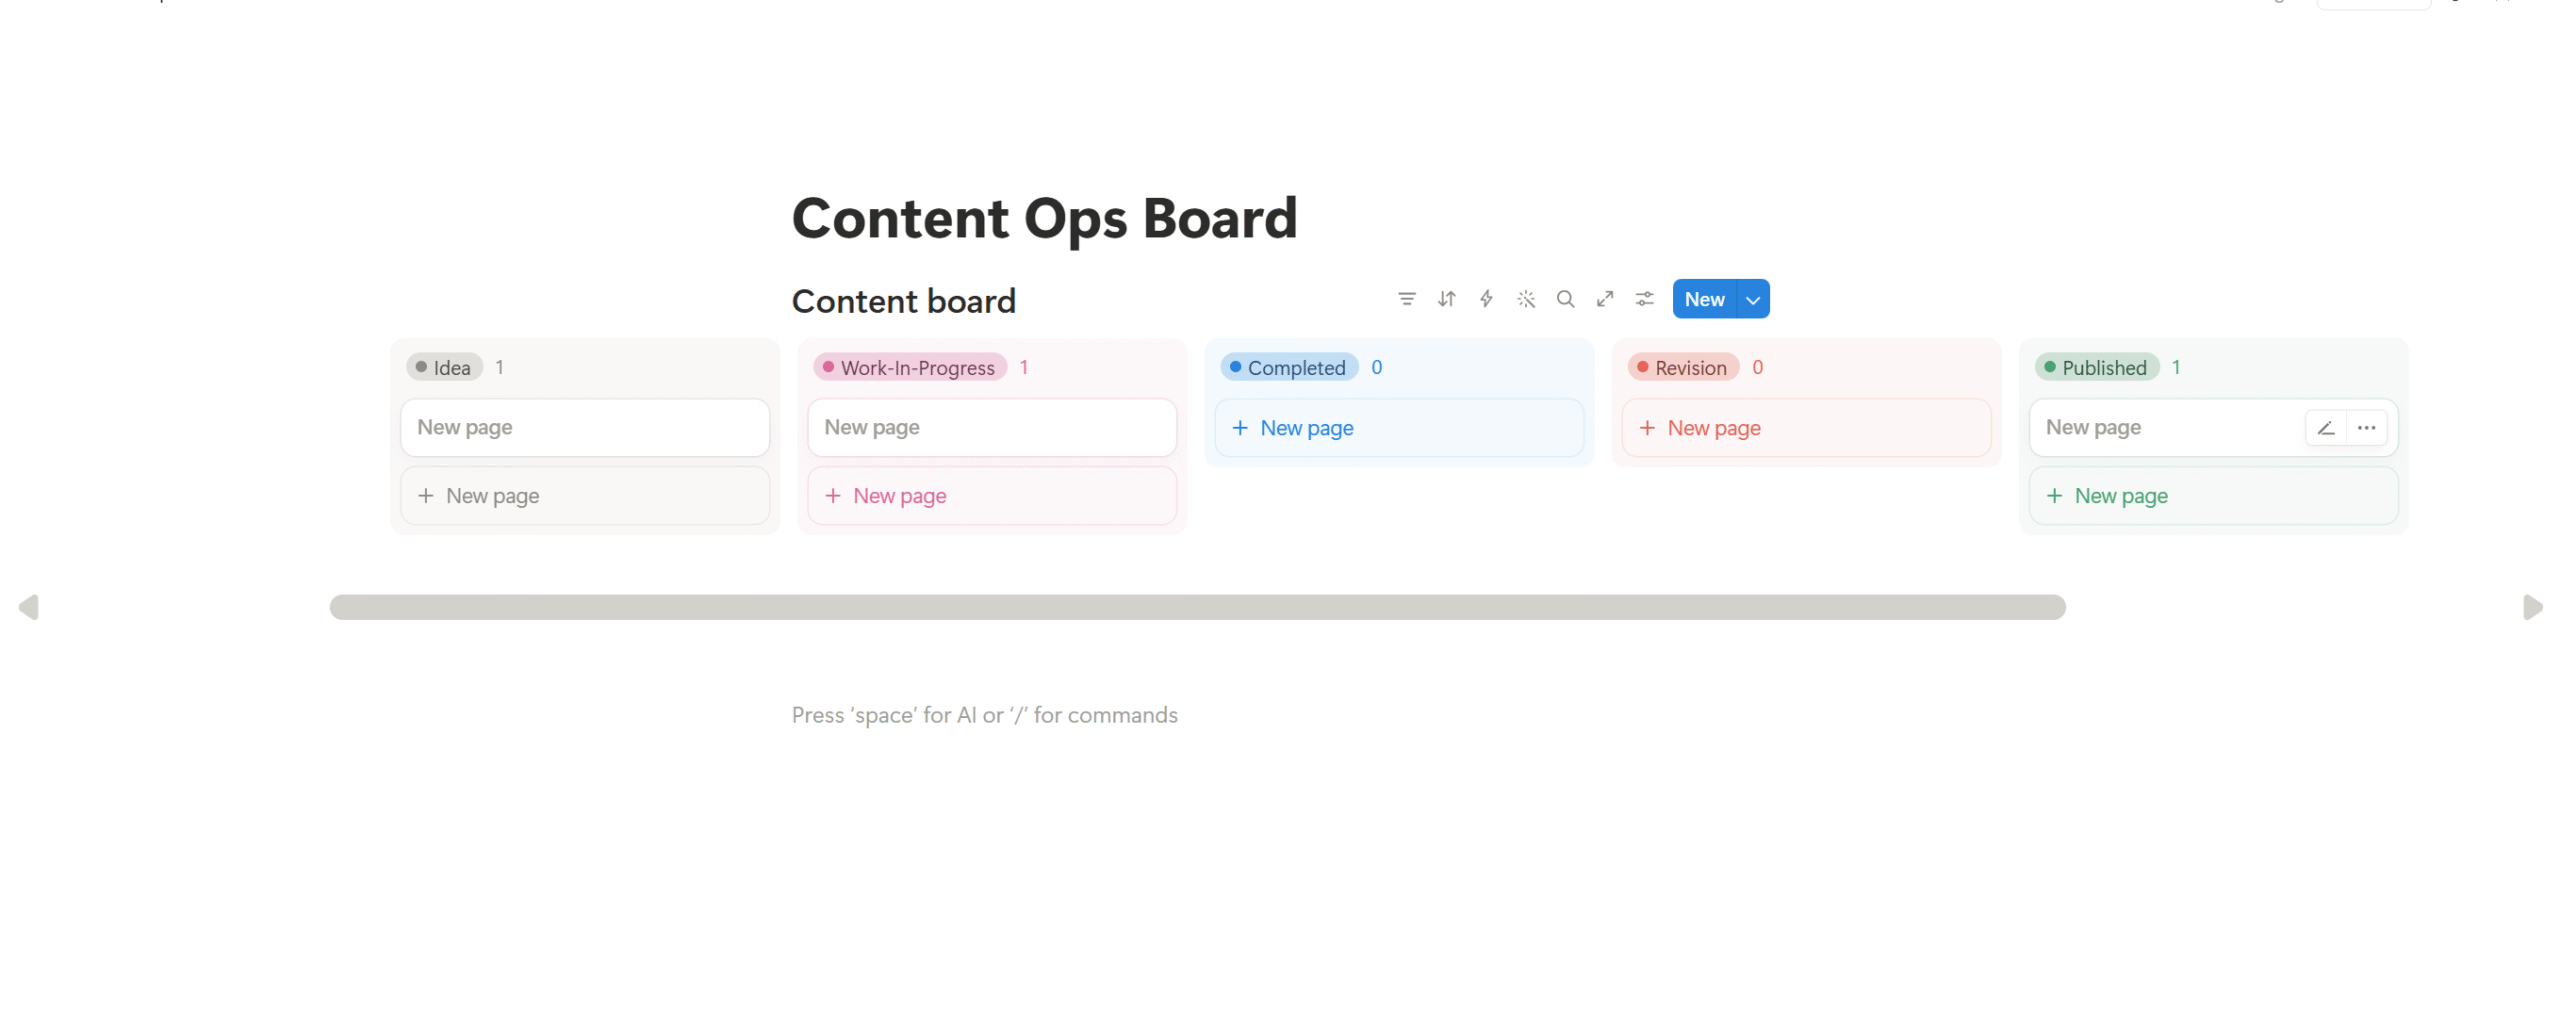
Notion, by default, shows basic columns (groups). You can add and remove columns, adjust the layout, and change the names.
Rename the columns as “Ideas, Work-In-Progress, Completed, Revision, and Submitted.”
You have now built a content pipeline.
Create Content Cards
In a Kanban board, tasks are represented as cards. Inside each card, you can add your topic details, including a priority score, set up a deadline, and write notes.
Under each column, you’ll find a “new page” option. It’s your task card. Click the + and start adding details.
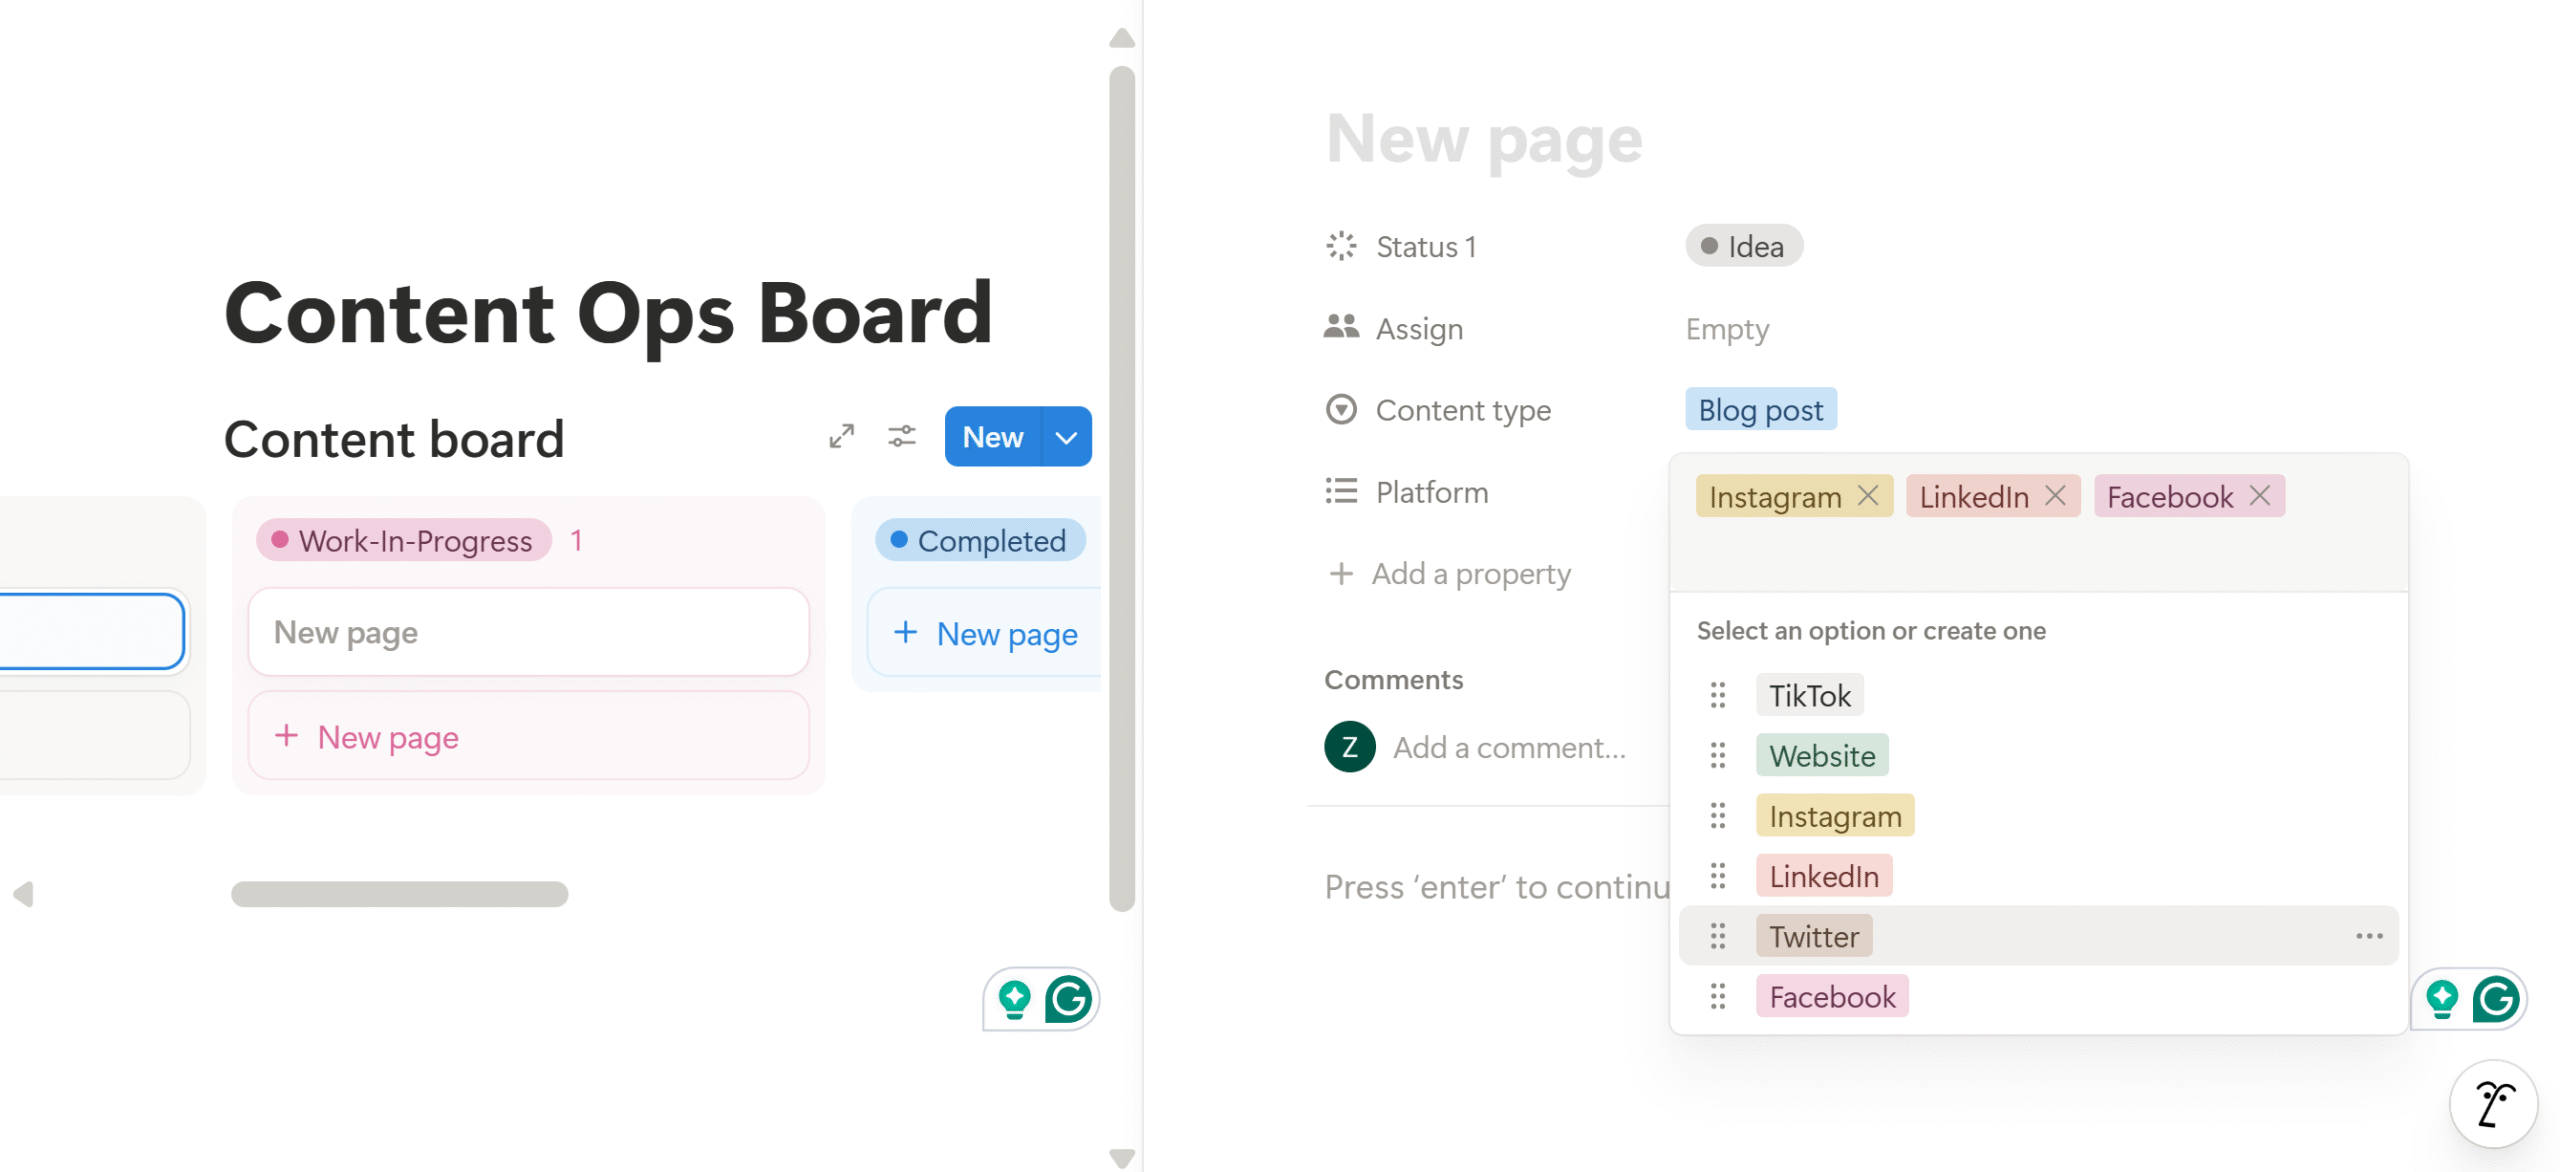
- Content Type: Click Property, choose Select, and change the text to Content Type. Then go to the options and start adding entries, such as blog posts and review articles, etc.
- Platform labels: It shows where the content will be published: You can add the platforms the same way you created the content type–using a property field. Choose multi-select in the menu this time.
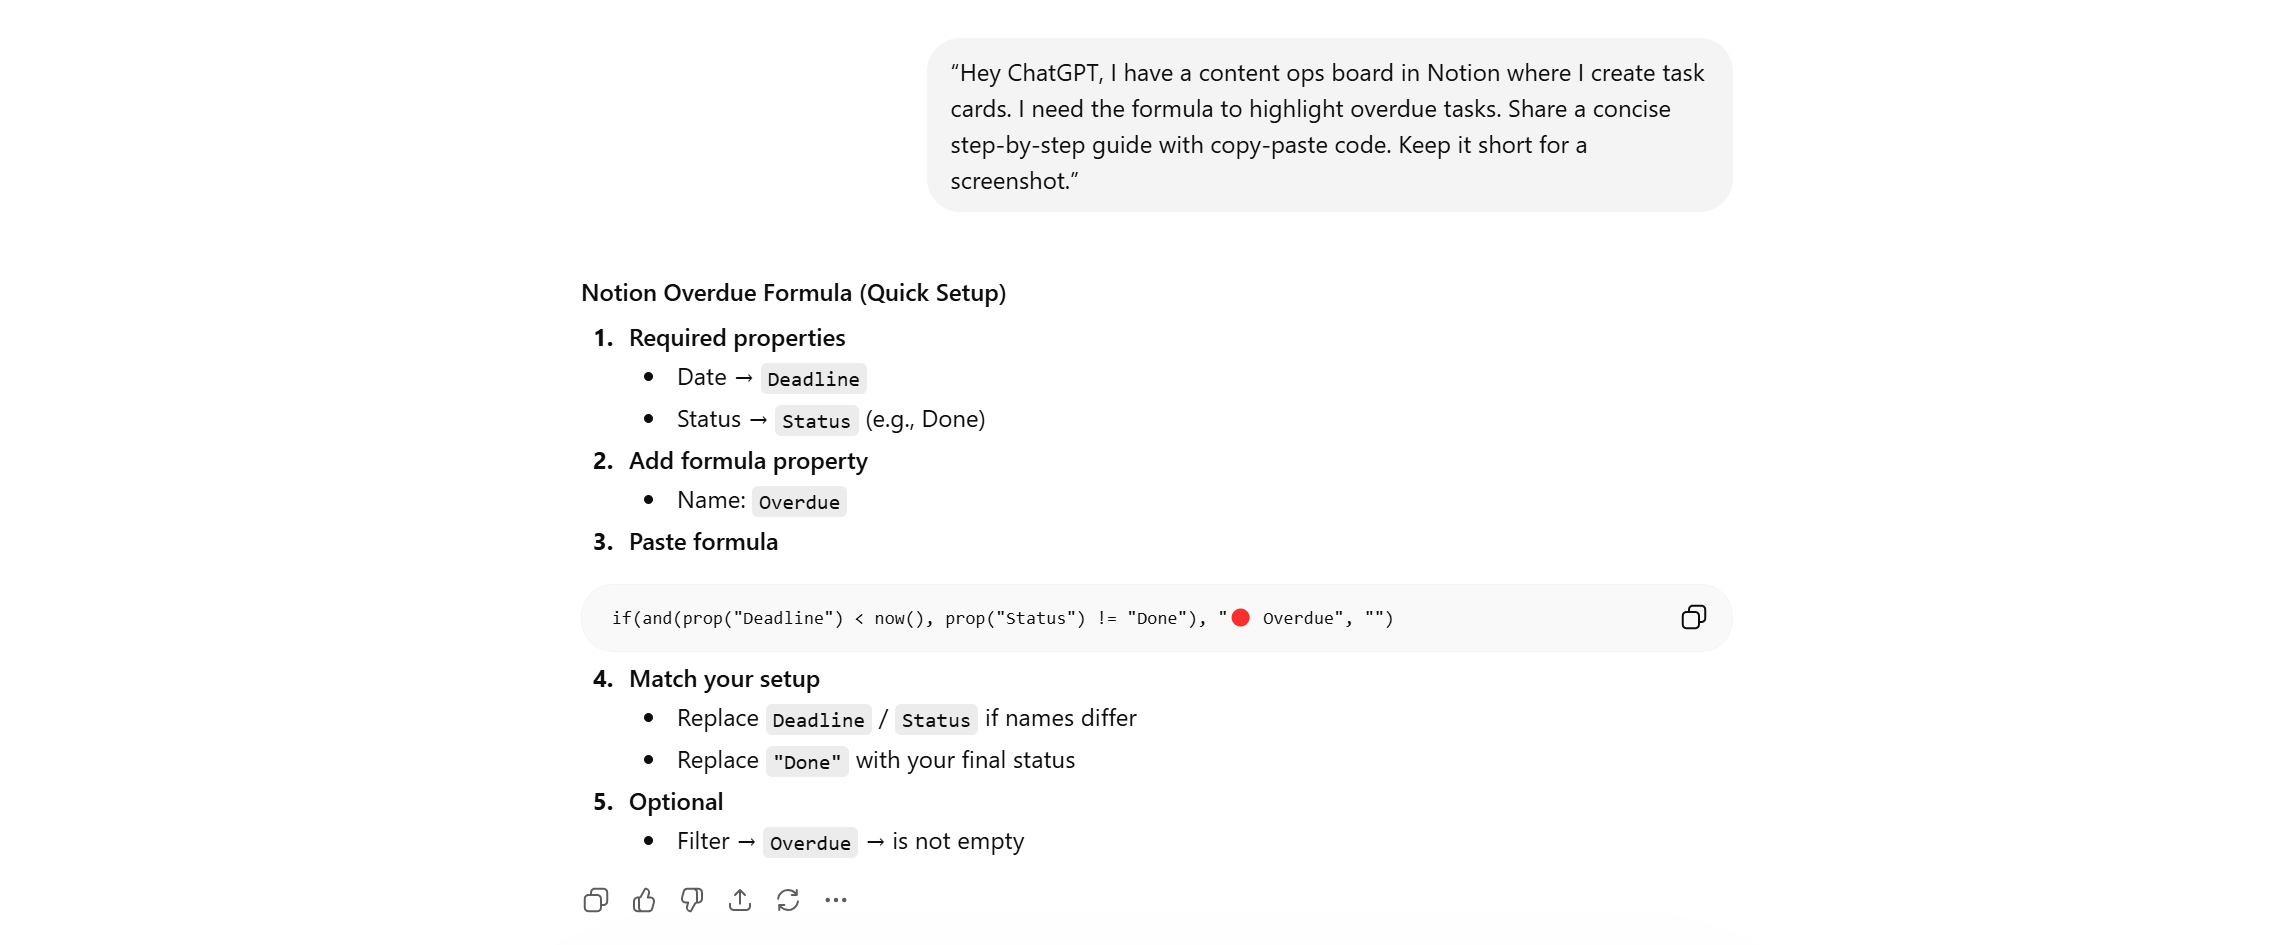
- Deadline: Set up your deadline in the property field. I used the formula here to highlight overdue tasks. The formula settings work similarly to the content type; the only difference is that instead of choosing “select,” you go to the “formula” menu.
Don’t look for formula tutorials. It’ll take time. Just ask ChatGPT for a copy-paste code with steps you can apply.
If you don’t know how to create a prompt, I’ve shared an example screenshot below.
I specifically asked ChatGPT for a concise guide, but the original response was more detailed. (You can even skip the deadline formula, by the way. It’s not necessary.)
That’s it! This is your simple content ops board.
I personally use the content ops board to manage my freelance work.
The “ideas” column is for my to-do list, “W-I-P” is for ongoing tasks, “Completed” is for the finished jobs, and “Revision” is for the edits.
Once I submit my project to my client, I move the cards to the “Submitted” column. When my client requests changes, I move the card back to the “Revision” column.
It’s a pretty simple system but works well for me.
As a solopreneur, you can use the content ops board for any purpose–social media content, SEO content pipeline, newsletter management, and even a personal knowledge base. It’s up to you.
The board is simple and flexible for any workflow.
I am linking my template here for you. You can duplicate or export it.
How To Use This Board For Bloggers (Simple Weekly Workflow)
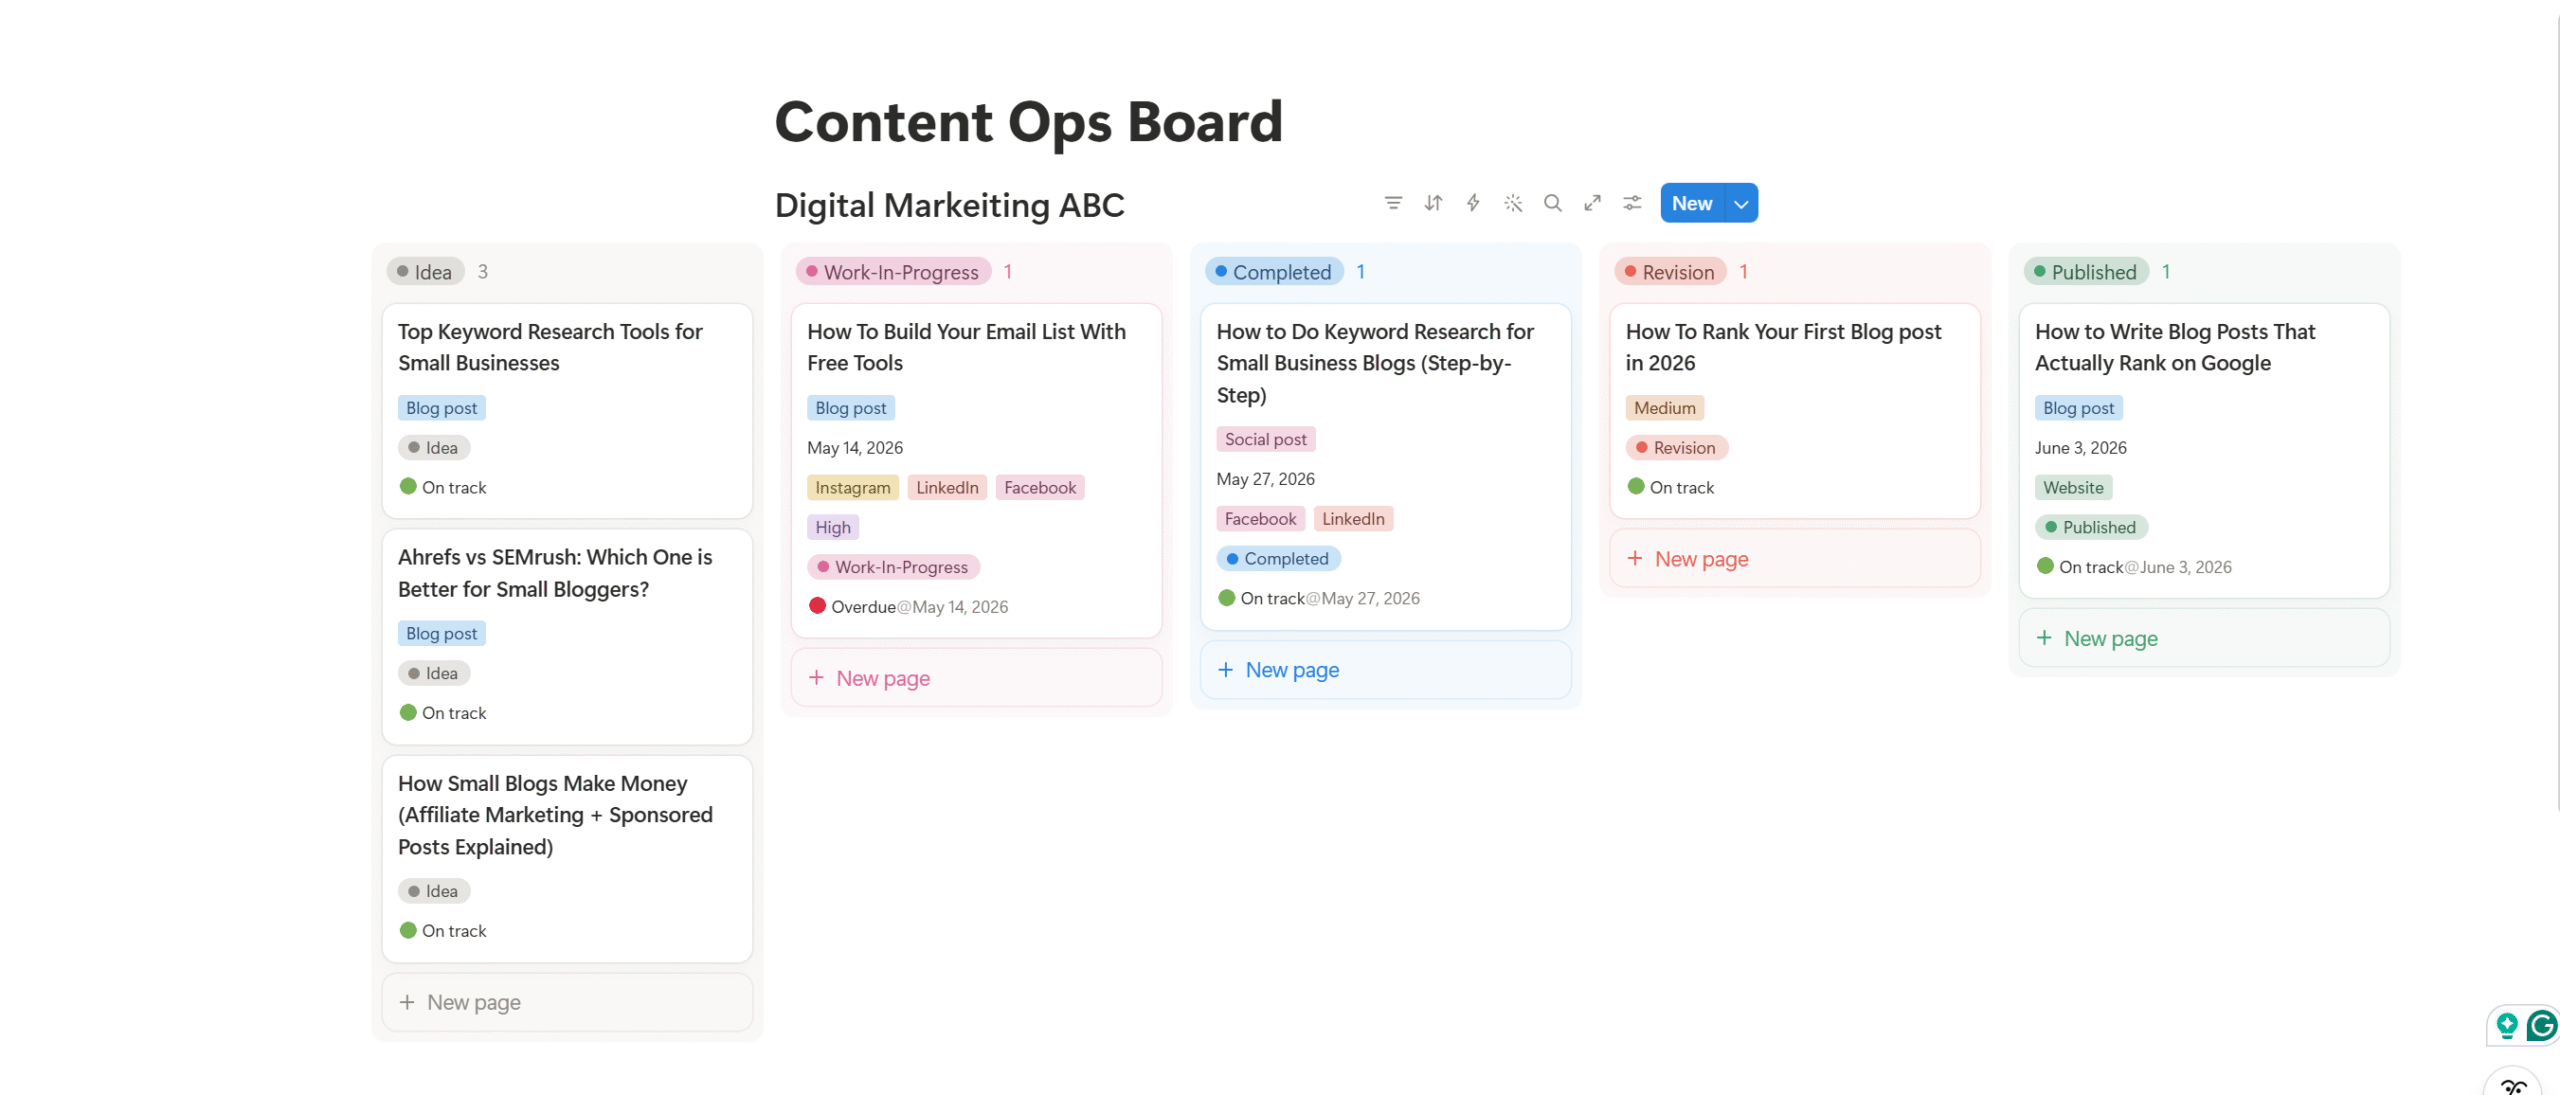
Now that we know how to set up a content ops board, I am going to share a 6-step guide to show how bloggers can manage their weekly workflows.
Let’s start with the basics—an idea dump.
1. Build Your To-do List
Blogging requires consistent content creation, which means you’ll constantly come up with new ideas.
Instead of recording them in three different places, store everything in your “Idea” column for later review.
This simple habit helps you build a steady content pipeline while keeping your mind clutter-free.
The great thing about a Notion task card is its flexibility. You can use it to store any content—topic ideas, keywords, questions, and social media posts.
Use this column as a central storage system for ideas and inspiration.
2. Choose Weekly Tasks
You often hear that bloggers need to publish daily to grow their audience and establish their presence.
While it’s true, it isn’t practical in the initial stage, specifically if you are a 1-person team.
It generally takes 3 to 6 hours to write a basic blog, and an in-depth article takes longer. Producing daily content at such a pace is simply unsustainable.
Instead of daily output, focus on consistency.
Choose a few tasks per week and move them to the WIP. By keeping your workload low, you can easily maintain the pace long-term.
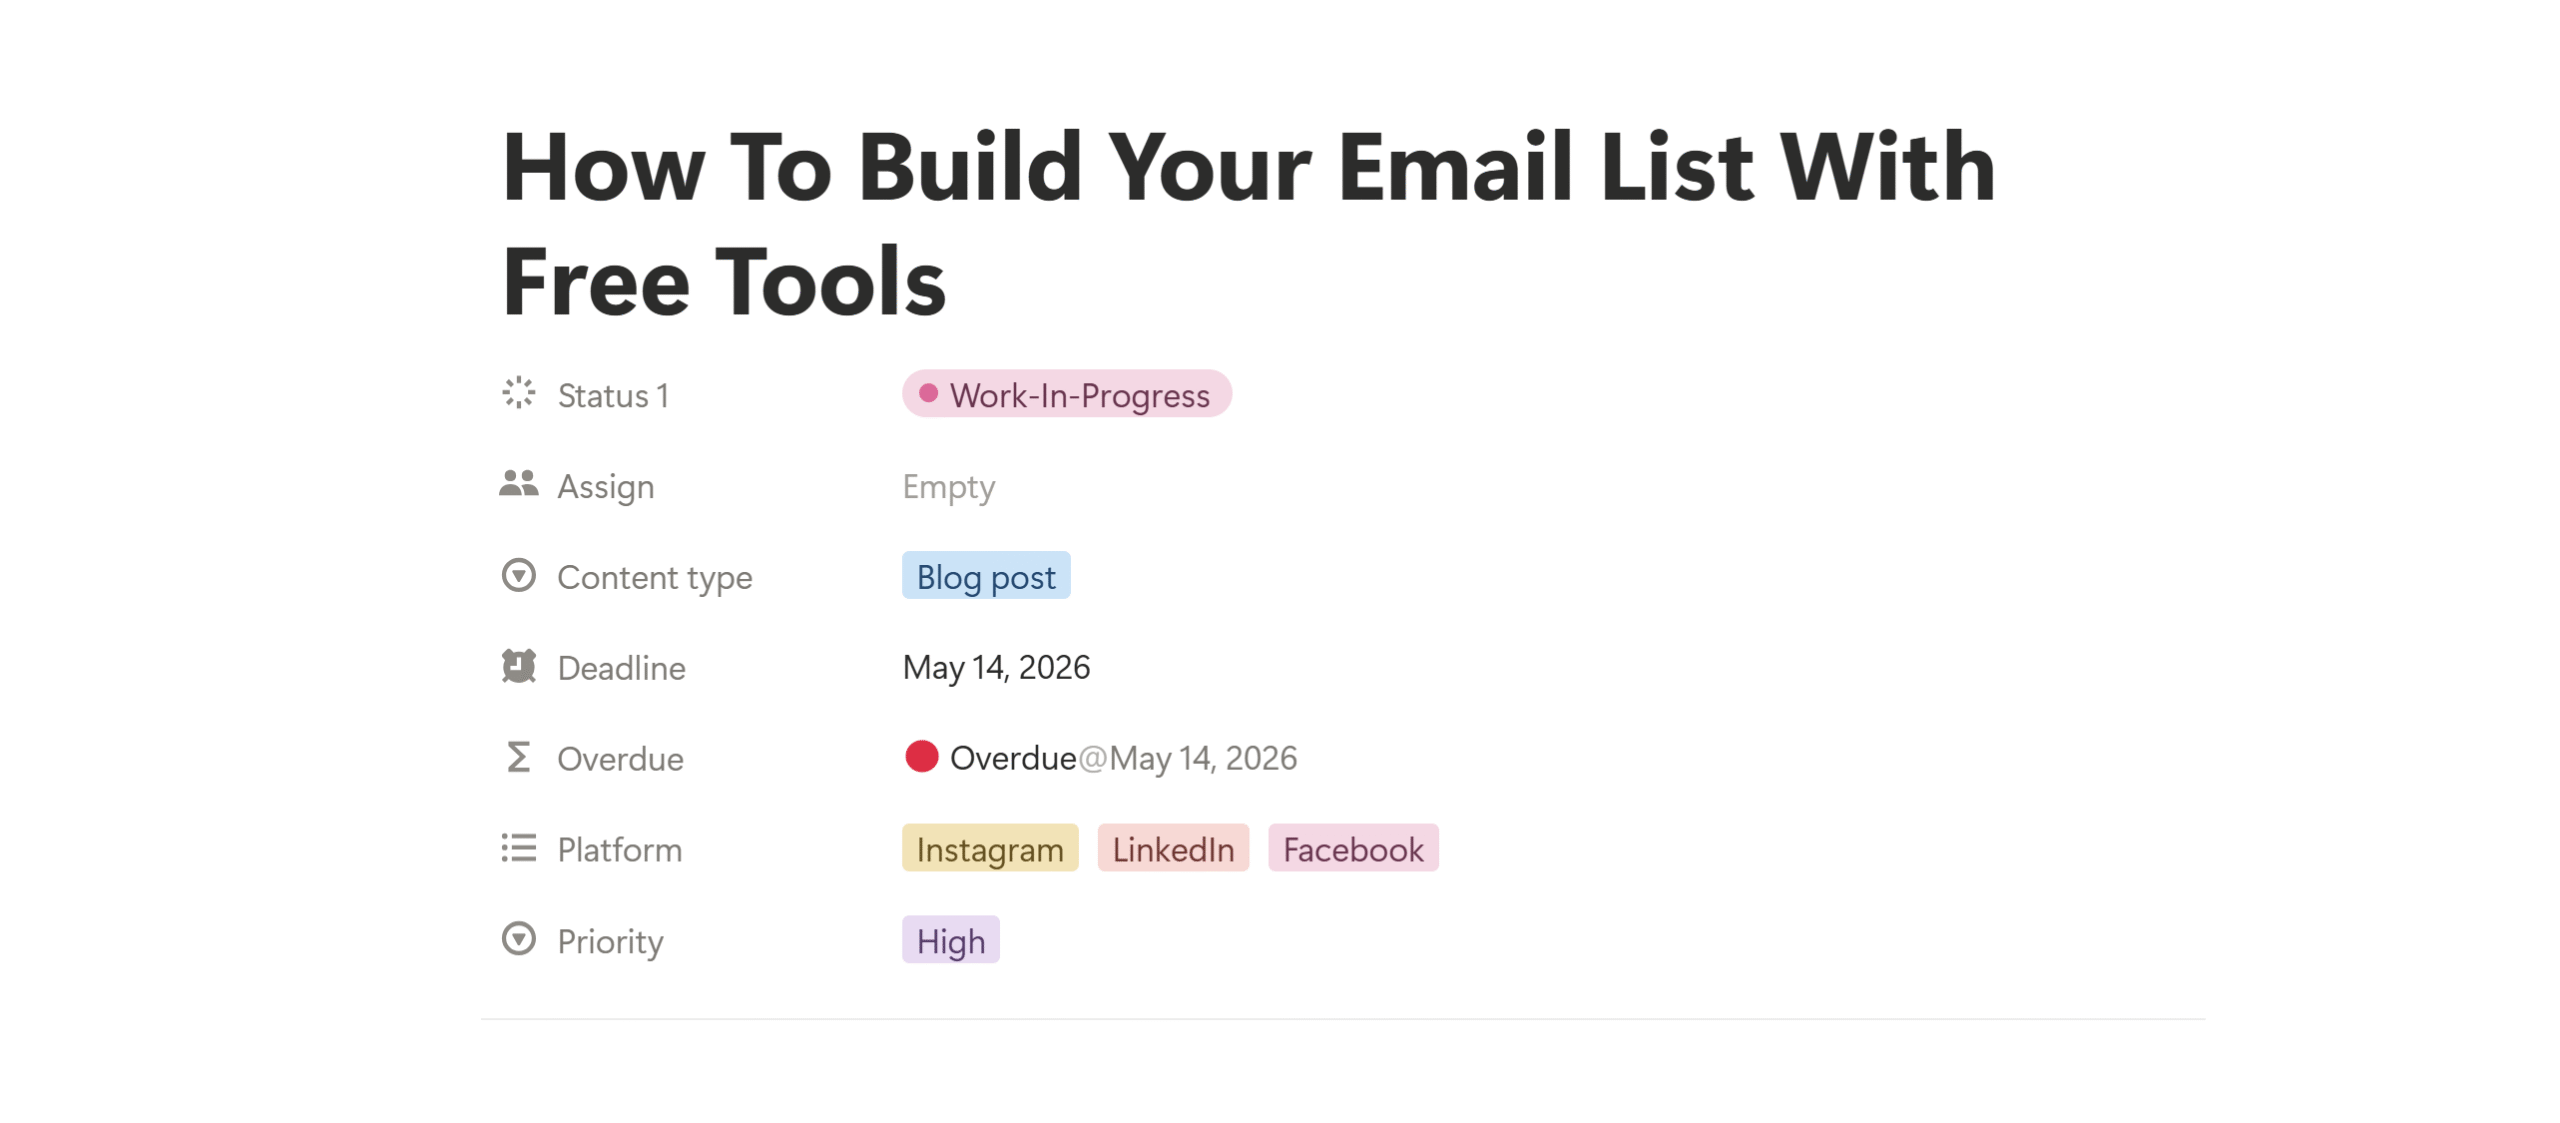
3. Set Deadlines
Once you have selected your active tasks, add priority tags and deadlines.
Priority tags serve a dual purpose. They clarify what matters the most and also reduce procrastination.
Without a deadline or priority tag, you’ll just pick up the easiest one and write it at your convenience.
If setting deadlines doesn’t improve your productivity, there’s another trick you can use to kill procrastination.
Break blogs into small parts and create separate columns for research, drafting, editing, and interlinking.
It’ll make the content ops board a bit complex, but it’s a proven technique and works well.
4. Update Your Content Ops Board Daily
In Notion, you manually drag the cards across the stages to show progress.
This visual tracking method is easy to follow and most effective—as long as you maintain a daily check-in.
Spend 5 minutes daily on your content ops board to see what’s overdue, what’s in progress, and what needs to be moved forward.
This small routine will keep your board accurate and reliable.
5. Do A Weekly Review
This is the most important part.
Every schedule needs a weekly reset to keep the workload realistic.
No matter how well you plan and optimize your workflow, tasks often get delayed during the week due to unexpected circumstances.
So, at the end of each week, do these things;
- Reschedule overdue tasks.
- Clean up your to-do list and archive unrelated items.
- Add new content ideas.
- Review your content strategy.
6. Track Your Published Items
The published column in the content ops board isn’t just for tracking completed jobs.
It acts as a record of your blogging performance, helping you track your content pattern, such as;
- What is your weekly output?
- How consistently do you post?
- What topics do you typically focus on?
You can use this historical record to identify the gaps in your content strategy and improve it based on actual outcomes.
Conclusion
A content ops board doesn’t need to be sophisticated to be effective.
A simple Notion Kanban board works well because it’s reliable and repetitive—exactly what a solopreneur with a tight schedule needs.
Just remember to treat your board as a content production system instead of a tracker.
If you use it as a simple visual tracker, over time it’ll become nothing more than a glorified checklist.
Start simple, get comfortable with the tool, and stay consistent.
You can always improve and scale later when needed.


 A better way to manage projects and clients for freelancers
 Get through busy days like a breeze with Reclaim.ai